Knex Roller Coaster Instructions: A Comprehensive Guide

Embark on a thrilling journey of engineering! This guide details building amazing Knex roller coasters‚ covering design‚ construction‚ debugging‚ and advanced features for enthusiasts.
Welcome to the exciting world of Knex roller coaster construction! These models blend creativity‚ physics‚ and engineering principles‚ offering a fantastic learning experience for all ages. Knex provides a versatile system for building dynamic structures‚ and roller coasters are a perfect demonstration of its capabilities.
This guide will navigate you through the entire process‚ from understanding essential pieces to troubleshooting common issues. We’ll explore how to design thrilling tracks‚ build robust lift hills‚ and create a functional roller coaster car. Whether you’re a beginner or an experienced builder‚ prepare to unleash your imagination and construct a captivating ride!
II. Essential Knex Pieces for Roller Coaster Construction
Building a successful Knex roller coaster requires a strategic selection of components. Key pieces include rods – providing structural support – and connectors‚ which join rods to create frameworks. Specialty pieces like curved tracks‚ loops‚ and angled connectors are crucial for dynamic track design.
Don’t underestimate the importance of stabilizers and foundations for a sturdy base. Wheel connectors and axles are vital for the car’s smooth operation. Having a diverse assortment allows for greater design flexibility and problem-solving during construction. Consider bulk purchases for larger‚ more complex builds!
III. Basic Knex Connection Techniques
Mastering Knex connections is fundamental to stable construction. Connectors grip rods firmly‚ but ensure a secure ‘click’ for maximum strength. Building stable foundations involves interlocking multiple rod-and-connector units‚ creating a rigid base. Triangles are your friend – they distribute weight effectively!
Experiment with different connector types for varied angles and structural integrity. Avoid over-tightening‚ which can damage pieces. Regularly check connections during construction to prevent collapses. A solid foundation is paramount for a thrilling‚ yet safe‚ roller coaster experience.
A. Utilizing Connectors and Rods
Connectors and rods are the building blocks of your coaster. Different connector types offer varying degrees of flexibility and stability. Gray connectors generally provide stronger connections than white ones. Rod length dictates structural spans; longer rods require more support.
Proper insertion is key – ensure rods ‘click’ securely into connectors. Experiment with combining different rod and connector configurations to achieve desired angles and curves. Remember‚ a well-connected structure minimizes wobble and maximizes the coaster’s performance and longevity.
B. Building Stable Foundations
A robust base is crucial for a successful roller coaster. Begin with a wide‚ rectangular foundation using interconnected rods and connectors. Triangles are your friend – incorporate them liberally for increased rigidity. Avoid tall‚ unsupported sections; distribute weight evenly across the base.
Consider layering multiple levels of foundation for complex designs. Securely anchor the base to a flat surface to prevent shifting during operation. A wobbly foundation leads to derailments‚ so prioritize stability above all else during this initial construction phase.
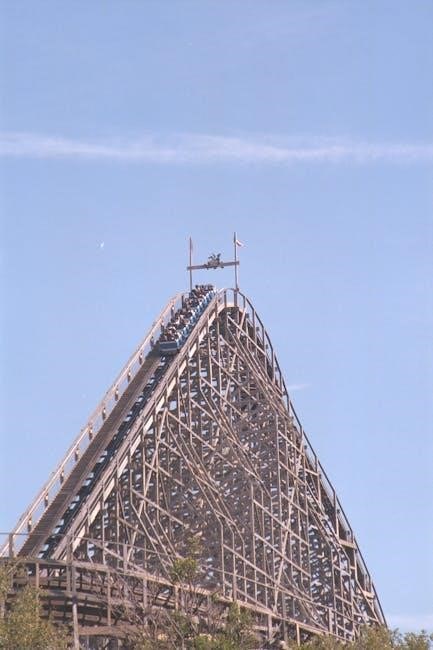
IV. Designing Your Roller Coaster Track
Track design dictates the ride’s excitement! Plan your layout on paper first‚ considering potential energy conversion. Gentle slopes build speed‚ while steeper drops offer thrills. Curves require careful construction to maintain momentum and prevent derailments.
Experiment with different track angles and lengths. Remember‚ a smooth transition between sections is vital. Avoid abrupt changes in direction. Utilize the .toQuery and .toString methods for debugging track geometry‚ but don’t rely on them for final construction.
A. Understanding Track Angles and Curves

Mastering angles and curves is crucial for a successful coaster. Shallow angles provide gradual acceleration‚ while steeper angles create dramatic drops. Curves must be banked slightly to counteract centrifugal force‚ preventing cars from flying off the track.
Carefully consider the radius of your curves; tighter curves require slower speeds. Use connectors strategically to achieve smooth transitions. Remember‚ Knex connections aren’t always perfect‚ so testing and adjustment are key. Utilize .toSQL.toNative for visualizing the track’s intended path during design.
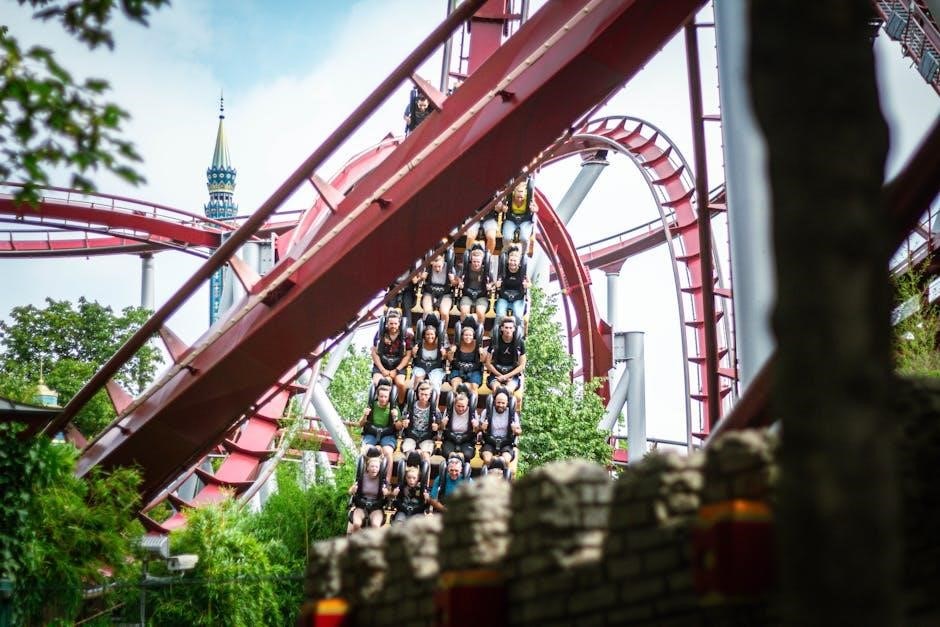
B. Incorporating Loops and Drops
Loops and drops add excitement‚ but demand precise construction. Loops require sufficient entry speed – build a substantial lift hill! Ensure a smooth transition into and out of the loop to prevent derailments. Drops should be followed by upward curves to manage momentum.

Experiment with different loop shapes; a clothoid loop is gentler than a circular one. Remember friction is your enemy; smooth connections are vital. Debug using .toQuery to visualize potential problem areas before full assembly.
V. Building the Lift Hill Mechanism
The lift hill provides initial energy. Manual designs utilize hand-cranked gears or a pull-and-release system. Motorized options‚ leveraging Knex motors‚ offer continuous operation. Consider gear ratios for speed and torque – higher ratios yield slower‚ stronger lifts.
Ensure a secure connection between the car and the lift mechanism. Debug potential slippage with careful alignment. Utilize Knex’s versatility to create robust‚ reliable lift systems. Remember to test thoroughly before integrating with the track.
A. Manual Lift Hill Designs
Simple and reliable‚ manual lift hills are excellent starting points. Employ a hand-cranked gear system‚ rotating a series of Knex gears to elevate the coaster car. Alternatively‚ a pull-and-release mechanism uses potential energy stored in bent rods.
Focus on smooth operation and consistent ascent. Careful gear alignment minimizes friction. Ensure the release point is precise for a seamless transition onto the track. These designs require user interaction but offer direct control and a satisfying building experience.
B. Motorized Lift Hill Options
For continuous operation‚ motorized lift hills are ideal. Utilize a Knex motor connected to a gear train or a worm drive to provide consistent upward motion. Consider speed control via variable resistors or pulse-width modulation (PWM) for adjustable lift speeds.
Ensure the motor has sufficient torque to handle the car’s weight. Securely mount the motor to a stable base. Implement a safety switch to halt the motor if the car stalls. Motorized systems add complexity but deliver automated thrills and extended play sessions.
VI. Constructing the Roller Coaster Car
The car’s design is crucial for smooth operation. Begin with a robust chassis built from interconnected Knex rods and connectors‚ prioritizing stability. Low center of gravity enhances performance‚ preventing derailments.
Attach wheels securely‚ ensuring free rotation. Use flexible connectors to absorb shocks. Test wheel alignment for minimal friction. Consider adding weight to increase momentum. A well-built car is the heart of your coaster‚ impacting speed‚ reliability‚ and overall enjoyment.
A. Chassis Design and Stability
A strong chassis is the foundation of a successful coaster car. Utilize a rectangular frame constructed with Knex rods‚ reinforced with connectors at each joint. Triangulation adds significant rigidity‚ preventing warping during operation.
Keep the chassis low to the ground for improved stability and a lower center of gravity. Experiment with different connector types to optimize strength and flexibility. A well-designed chassis will withstand the stresses of the track‚ ensuring a smooth and reliable ride.
B. Wheel Attachment and Smooth Rolling
Securely attaching wheels is crucial for minimizing friction. Use Knex connectors to firmly attach wheels to the chassis‚ ensuring they rotate freely. Avoid over-tightening‚ which can cause binding. Consider using washers between the wheel and connector to reduce friction further.
Test each wheel’s rotation before assembly. A smooth rolling car requires consistent wheel alignment and minimal wobble. Regularly inspect wheel attachments during testing and adjust as needed for optimal performance and a thrilling ride!
VII. Assembling the Track Sections
Carefully connect pre-built track sections‚ ensuring smooth transitions between each segment. Utilize a stable base to prevent shifting during construction and operation. Pay close attention to alignment; even slight misalignments can cause derailments.
Reinforce connections with additional Knex pieces for added stability‚ especially at curves and drops. Regularly test the track’s integrity as you assemble‚ making adjustments as needed. A well-assembled track is the foundation of a successful roller coaster!
VIII. Testing and Troubleshooting
Initial testing requires careful observation. Gently release the car and identify any friction points causing slowdowns or stoppages. Check for track misalignment‚ loose connections‚ or obstructions. Adjust track sections to ensure a smooth‚ continuous path.
If derailments occur‚ reinforce vulnerable areas and refine curves. Debugging often involves iterative adjustments; small changes can yield significant improvements. Utilize the .toSQL.toNative method for query analysis if motorized elements are present.
A. Identifying Friction Points
Pinpointing friction is crucial for optimal performance. Observe the car’s movement closely during test runs. Common areas include connector junctions‚ track curves‚ and lift hill transitions. Listen for scraping or grinding sounds indicating resistance.
Ensure rods are fully inserted into connectors and that track pieces are securely fastened. debug: true in your configuration can help identify problematic SQL queries if motorized. Smooth surfaces and proper alignment minimize energy loss‚ maximizing speed and distance.
B. Adjusting Track Alignment
Precise track alignment is paramount for a successful ride. Use a level surface as a foundation and meticulously check for dips‚ rises‚ or lateral shifts. Small adjustments can dramatically improve performance.
Slightly loosen connectors and reposition track sections‚ ensuring smooth transitions between pieces. Remember .toSQL.toNative for debugging SQL queries. Consistent banking on curves reduces stress and maintains momentum. Prioritize stability; a wobbly track introduces friction and potential derailments.
IX. Advanced Knex Roller Coaster Features
Elevate your builds with complex elements! Incorporating multiple cars demands a robust lift hill and carefully calculated spacing to avoid collisions. Experiment with banked turns for increased speed and visual appeal.
Consider adding special effects like tunnels or jumps‚ ensuring structural integrity. Utilize Knex’s versatility to create unique track layouts. Remember‚ knex-paginate simplifies pagination for complex designs. Objection.js offers a higher-level approach‚ but Knex provides raw SQL power.
A. Incorporating Multiple Cars
Scaling up the excitement! Running multiple cars simultaneously requires a significantly stronger lift hill mechanism‚ capable of handling the increased weight. Precise car spacing is crucial; too close‚ and collisions occur. Too far‚ and the ride loses its flow.
Ensure consistent wheel attachment and smooth rolling for each car. Consider a staggered launch system to prevent bunching. Debugging becomes more complex‚ so meticulous testing is vital. Remember‚ Knex’s flexibility allows for creative solutions!
B. Adding Special Effects (e.g.‚ Turns‚ Banks)
Elevate the thrill with dynamic elements! Introduce banked turns for realistic g-forces‚ carefully calculating angles to maintain momentum. Incorporate helixes and spirals‚ but prioritize structural integrity – reinforce connections. Experiment with sudden drops and unexpected twists‚ ensuring the car remains securely on the track.
Remember‚ smooth transitions are key. Test each effect thoroughly‚ adjusting track alignment to minimize friction. Creative use of Knex pieces unlocks unique ride experiences!
X. Safety Considerations During Construction and Operation
Prioritize safety throughout the process! Ensure a stable foundation to prevent collapses. Regularly inspect connections for looseness‚ reinforcing as needed. Never operate the coaster near faces or fragile objects. Supervise children closely during construction and testing.
Avoid excessive speeds that could cause derailment. Implement a braking system or catch mechanism. Be mindful of pinch points during operation. A well-built‚ carefully tested coaster provides safe‚ exhilarating fun!
XI. Common Knex Roller Coaster Problems and Solutions
Troubleshooting is key to success! Derailments often stem from track misalignment or friction points – adjust angles and smooth connections. A stalled car indicates insufficient lift hill power or excessive track resistance. Check for binding or tight curves.
If the car doesn’t complete the circuit‚ examine loop heights and drop angles. Utilize debug mode (debug: true in config) to identify SQL query issues if motorized. Reinforce weak foundations and test incrementally!
XII. Resources for Knex Roller Coaster Inspiration
Unlock your creative potential! Explore online communities like YouTube and Flickr for diverse Knex coaster designs. Search for “Knex roller coaster” to discover builds ranging from simple to incredibly complex. Websites dedicated to amusement park engineering can also spark ideas.
Consider studying existing roller coaster layouts for inspiration on track elements. Don’t hesitate to adapt and modify designs to suit your Knex parts and desired features. Remember‚ experimentation is crucial!
XIII. Knex Database Connection and Debugging (Related to Knex Tooling)
For motorized coasters‚ database interaction aids control! Utilize npx knex to access command-line tools for configuration checks. Enable debug: true in your database config to view SQL queries and parameter bindings‚ aiding troubleshooting.
If connections fail‚ Knex attempts reconnection‚ but verify sequence/auto-increment settings for ID fields. Remember .toSQL.toNative for templated SQL debugging‚ avoiding .toQuery or .toString in production.
XIV. Utilizing Knex CLI for Project Management
Streamline coaster development with Knex CLI! Access commands via npx knex‚ managing migrations and seed data for complex track layouts or motorized lift hills. This tooling helps organize large projects‚ ensuring consistent database schema updates as your coaster evolves.
Leverage the CLI from your project directory to efficiently manage changes. Consider it essential for collaborative builds‚ maintaining version control‚ and simplifying deployment of coaster control systems.
XV. Advanced Query Building with Knex (For potential motorized elements)
Control coaster elements with Knex queries! While primarily a builder‚ Knex facilitates database interactions for motorized features – tracking ride statistics‚ managing sensor data‚ or controlling lift hill speeds.

Remember‚ .toQuery and .toString are for debugging‚ not production. Utilize .toSQL.toNative for templated SQL. Avoid direct value escaping; Knex handles this. Consider Objection.js for a higher-level ORM approach if complex data management is needed.